Showing posts with label recipes. Show all posts

Wednesday, September 18, 2013

Paleo Apple Muffins.

It is apple season and thanks to the generosity of our neighbors, we are loaded down with apples right now. We've been eating them and eating them and yesterday I decided we needed to get serious about using them up. So I decided to bake.

Always a good thing, in my book.

I was going to make a regular old apple cake. The same flour-and-sugar filled cake that I've made several times in the past. It is a favorite around here. But it is also -- as I mentioned -- filled with flour and sugar.

I don't eat those anymore and I am trying to get my boys to eat way less of them, too.

So, I figured I would try some paleo apple muffins.

I searched the good ol' Internet and came up with plenty of recipes. The only problem was that they all called for almond flour and, honestly, I wasn't feeling the almond flour yesterday. I wanted something different. Something nut-free.

The time was right to put on my creative baker hat and I fiddled around with a few recipes and came up with one that I love.

Mmmm . . . yummy . . .


My boys have gobbled these muffins up. Gobbled!

If you like apples and you like muffins, you need these in your life. Trust me.

Appley goodness. Let's get to it!

Paleo Apple Muffins
(makes one dozen)

Ingredients

5 eggs
1/2 cup melted coconut oil (I use Trader Joe's organic)
1 tsp vanilla
1/2 cup maple syrup
1/2 cup coconut flour (I use Bob's Red Mill organic)
1/4 tsp baking soda
1 tbs cinnamon (don't be stingy!)
1/4 tsp nutmeg
3 medium/large apples, peeled and chopped

Directions

Preheat oven to 350 degrees. Grease a standard muffin tin.

Whisk together the wet ingredients.

Sift in dry ingredients all together. Whisk or mix until well combined. Mix in apples. 

Fill muffin tin with batter and bake for 35 to 40 minutes.

   
You'll end up with a dozen delicious muffins that look a little something like this:

Same picture! Two times!

Gobble them up!

OK, sure. These muffins have maple syrup in them. I know that isn't ideal but, really, you need to have a little sweetness in your life every now and then. Seriously. So, splurge on the maple syrup and treat yourself.

Try these! 

Then tell me what you think. 
I can't for a minute believe that my family and I are the only ones who love these!!


Happy baking!


Tuesday, March 19, 2013

Designer Whey snacks and sips.

I have never been a huge protein powder kind of gal so it is quite the admission to say that I've recently been won over. Which I have.

Let me give you a little history: I'm super wary of soy (the main ingredient in many protein powders) and try to avoid it. Also, I believe in getting nutrients from whole foods.

But then, in January, I was put on my sugar-free diet and, well, things changed. Not the soy part -- I'm still not in favor of soy. But the protein powder part. That, I'm down with.

See, if I want to have sugar in my diet, it needs to be from natural sources like fruit. But it also needs to balanced out by plenty of fiber and protein. Since fruit generally is pretty high in fiber, that first part is covered. Protein, though? There isn't all that much of it in fruit.

Welcome to my world, protein powder!

When I was given the opportunity to review Designer Whey protein powder I was excited to try it out. I started out by adding a scoop of the vanilla powder to my regular smoothies (banana, strawberry, a little almond milk), ate a few of their protein bars, tried the pre-mixed shakes after two tough runs, and then I decided to get a little crazy. I decided to branch out a little and experiment. I made some different smoothies with success and before I knew it, I was cooking-up (OK, processing up) new energy bites recipes.

Yes, that's apparently what passes for crazy around here!

Anyway . . . I added the vanilla powder to some of my standard energy bites recipes and felt pleased that my sweet treats were now protein rich as well.

Good for me.

And then things got even better for me. I opened my can of white chocolate protein powder. I took out a bag of pistachios. I went to town.

To Delicious Town.

Friends, these are my favorite:


You want the recipe, don't you?

Of course you do.

And I'm not stingy, so here you go:

Pistachio White Chocolate Energy Bites


  • 1/2 cup shelled pistachios 
  • 1/2 cup unsweetened shredded coconut
  • 1 cup whole (but pitted) medjool dates
  • 1 scoop white chocolate Designer Whey protein powder
  • about 1/8 cup water

Process the first 4 ingredients in a food processor until well blended and the nuts and coconut are finely chopped. Add the water and pulse. The mixture will begin to clump together in a big ball. This is what you're going for. Once you have this dough, stop processing and form into balls, or squares if you prefer. I like to make mine big enough for two bites but feel free to make yours smaller or larger.

*     *     *

These are so good. The pistachio/white chocolate combination is perfect and the dates give the energy bites just the right amount of sweetness.

For someone (like me!) who needs to be concerned with balancing carbs with protein, these are a good solution.

I also made a wicked-good green smoothie:


Smooth. Creamy. Satisfying.

And easy to whip up:
  • 1 frozen banana
  • 1 cup frozen spinach
  • 1/2 an avocado
  • 1 cup almond milk
  • 1 scoop vanilla Designer Whey protein powder
  • a few ice cubes

Blend.

Drink.

Enjoy.

Here's what I like about Designer Whey protein powder (aside from the really good taste of the white chocolate):

  • Whey is something that I can consume (my options are limited, after all), so that's a win right there
  • It has a low glycemic index
  • It is grain-free (gluten, corn, etc.) and peanut-free
  • All the whey is produced in the USA
Here's what I don't:
  • It contains soy lecithin. Granted, not that much but still. Why must there be soy in everything? I really wish this was a completely soy-free option, since there aren't many out there.

Overall, I like the products. 

I'm using it instead of yogurt in my smoothies. I'm adding it to my energy bites to balance the carbs. I'm checking out other recipes and have found a few dessert ones that I really need to try. For me, Designer Whey is a good addition to my pantry!

To buy: Designer Whey is available at most grocery and mass market stores. You can find store locations on their web site.

Have you tried Designer Whey? 
What do you think? What's your favorite recipe using protein powder?


Thanks for stopping by!


Review disclaimer: I was sent free products for this review through FitFluential but was not otherwise compensated. The opinions expressed are entirely my own.


Thursday, March 7, 2013

Paleo brownies.

You need these in your life.


For real. These brownies are soooo good and when you eat them, you will swear that there is no way they are sugar-free/grain-free. And yet they are!

I found a recipe for these Magic Brownie Bars on the PaleoOMG site. They looked delicious and since I've been craving dessert, I had to try them. Still wanting to be basically sugar-free with my eating, and not having any coconut flour on hand, I had to change up the recipe a bit but it didn't matter. I've never had the original so I can't compare my version but I do think they are great and they don't miss the extra honey called for in the original recipe.

So . . . here's the recipe:

Ingredients

Brownie layer:
15 dried medjool dates, pitted
1/4 cup coconut manna (liquified)
1/4 cup unsweetened dark cocoa
2 tbs almond flour
3 eggs, whisked
1 tsp vanilla
1/4 tsp baking powder
1/4 tsp baking soda
pinch of salt

Coconut layer:
1-1/2 cups unsweetened shredded coconut
4 tbs coconut manna (liquified)
1 tbs honey
2 egg whites

Directions

Preheat the oven to 365 degrees (yup, that's 365).

Put dates in a food processor and process until they form a clump. Add coconut manna and cocoa and process until smooth.

Add remaining ingredients and process until combined and smooth.

Spread into an 8 x 8 pan lined with greased aluminum foil.

For the coconut layer, mix first 3 ingredients together in a bowl. Add well-whisked egg whites and stir to combine.

Pour topping over the brownie layer and spread to cover the whole surface.

Bake for 20-25 minutes. Cool. Cut into bars and enjoy!


YUMMY!

And, OK, OK. They aren't 100% sugar free. But, look, there's only one measly tablespoon of honey in the whole batch. And when you think of that one tablespoon of honey spread across the entire pan of brownies . . . well, that means there's hardly any honey in any given bar. So, really, basically sugar free!

Yes, I am justifying the use of honey!

Try them out for yourself. And let me know what you think!

Have a great day, everyone!


Wednesday, February 6, 2013

Triple berry low-sugar muffins.

As I've gone sugar-free, I've been moving my family's diet more in that direction as well. It is unbelievable how much sugar is in everything. It's nuts.

Anyway, one of the things I've been doing is altering recipes so they use less sugar, less flour, less junk. One of my -- and my sons' -- favorites is my new triple berry low-sugar muffin recipe!

They are moist. And berry-licious. My older son can easily eat two or three in a sitting and, honestly, I'm OK with that because they are full of good stuff! Here's my recipe so you can enjoy these goodies as well.

Triple Berry Low-Sugar Muffins

Ingredients

1/3 cup brown sugar (not packed)
4 tbs. butter
1 cup plain yogurt
1/2 cup unsweetened applesauce
1 tsp. vanilla

1/4 cup flax meal
1/2 cup finely ground unsweetened coconut (or coconut flour)
1/2 cup whole wheat flour
1 cup white flour
1 tsp. baking powder
1 tsp. baking soda

2 cups frozen unsweetened berries I use a triple berry blend of blueberries, blackberries and raspberries

Directions

Preheat oven to 350 degrees. Grease bottoms and sides of a 12-cup muffin tin.

In a large bowl, beat sugar and butter. Add remaining wet ingredients and mix well.

Add dry ingredients and stir until just combined. Stir in frozen berries. The batter will be pretty lumpy, just make sure it is combined.

Fill muffin tins with batter. You will likely have more batter after filling your 12 tins. I've found it is enough for about 4-6 additional muffins. If you have an additional muffin pan of that size, great. If not, a small bread pan (not regular loaf size) will work but you'll need to keep that in the oven a little longer than the muffins.

Bake muffins for about 22-26 minutes until the edges start to brown a little and a toothpick comes out fairly clean (but not completely -- you don't these to dry out!). Let them set for a few minutes before moving them to a rack to cool.

Enjoy!


As you can see, these are free neither or sugar nor wheat flour. However, they are much lower in both than most muffins and I like that. So, these might not be right for me on my sugar-free diet, but they are good for my boys as I try to feed them good foods for life.

Try them -- and let me know if you like them!

Do you have a favorite healthy muffin recipe?

Thanks for stopping by!


Tuesday, May 22, 2012

Kale recipes (or how I got my kids to eat - and love - kale).

My boys are kale addicts. Addicts, I tell you.

They love it. Beg me to buy it. Plead with me to cook with it. Jump for joy when we talk about growing it in the garden. Addicts.

And I couldn't be happier.


I love that the boys love kale because kale is a rockin' good food -- loaded with vitamins A, C, and K (among others), and full of  fiber, iron, calcium, and even a little protein. But, you know, it is a little weird. I mean, kale? Have you looked at it lately? Doesn't jump out as a #1 kid favorite.

So, how, you may wonder, did we get here? How did I turn my little guys into kale lovers?

The answer is: A little olive oil, some salt and a waaaaaaay too enthusiastic mama.

I started out all low key, nonchalantly introducing kale to the kids one day. "Oh, hey. This is a funny vegetable," I said while putting the groceries away. Of course, Conal wanted to know what it was. "Oh, just kale." 

And I left it at that.

His curiosity got the better of him and soon he wanted to know what kale was for. "Oh, man. Well, I love it. I mean, I could eat it all the time. I like to make chips out of kale. And other things. But, I'll probably make chips this time and eat them all myself."

The boy took that as a challenge. No way was he going to let me eat the chips all by myself.

"You want to help make them?"

Of course he did. And so we made kale chips. Easy peasy:

Kale Chips

1 head of kale
olive oil
kosher salt

Preheat oven to 350. Peel the kale off the stalks, breaking it into pieces as you do:


Wash thoroughly. Dry as well as you can. Spread kale pieces on a baking sheet (you'll probably need two). Drizzle olive oil over the kale and rub it into the kale pieces. Sprinkle with salt. 


Bake in the oven for 10-20 minutes (depending on how stuffed your baking sheet is).  Check the chips often, to make sure they haven't burned and to stir. They'll shrivel up quite a bit: 


When they are crisp, take them out and eat 'em up! 


If you're lucky, you might get to enjoy a few -- my kids eat at least half of them within the first few minutes of taking them out of the oven.


I also use kale in lots of other dinner recipes. One of my boys' favorites is rotini with kale and carrots:


I simply saute sliced carrots and kale in a little olive oil while I boil the pasta. When the pasta is still firm, I add it to the vegetables, along with a half cup of chicken broth. I let that boil down for about 5 minutes and that's it. I serve it with a little shredded pecorino romano and the kids love it.

Seriously. They eat all the kale before the even start on the pasta. 


And then they ask for more. Of the kale.


And that's how I did it, that's how I created little kale lovers. If you want to get your kids to love -- or maybe just try -- kale (or any other vegetable, really), my advice is to start with a kid-friendly recipe, like the kale chips. Do not give your kids any indication whatsoever that the vegetable is weird, or that they might not like it. In fact, just act cool, like the vegetable is no big deal at all.

Once you've hooked them, expand the recipes you make with the vegetable. If you don't meet with success the first time, though, don't give up! Be cool and keep trying!


Enjoy your kale, everyone!

~ Felice


Tuesday, April 17, 2012

Homemade larabar-type energy bars.


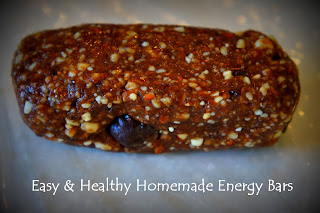
I've been busy in the kitchen again. Lucky you. This means I have a delicious treat to share today: Chocolate almond energy bars.

These homemade Larabar-type bars are my new favorite. For a while, I was stuck on my two-ingredient cashew cookie bars (cashews and dates, yum!). Now, I'm getting on stuck on these five-ingredient bars.

They are so good. Seriously.

Even the kids love them. Well, mostly the toddler. He's slightly addicted and, really, I don't mind. These bars are relatively healthy -- especially when compared to some of the other junk they could be eating, including those so-called healthy granola bars that are nothing of the sort.

So, my bars. I've found homemade Larabar recipes on a few different sites and through a bit of experimentation, I've modified those recipes to my own liking.

The base for the bars is always the same: Dates. Sweet, delicious dates. I buy whole, unsulphured medjool or deglet dates at the local food co-op. For these bars, I used deglet dates:

Mmm . . . dates!
My advice is to start with the whole dates, not chopped dates. Chopped just aren't the same quality. Go for whole. Trust me.

OK. So, here's my recipe for these tasty bars!


Chocolate-Almond Energy Bars

2/3 cup whole medjool or deglet dates, chopped

1 cup almonds (NOT salted)
handful dark chocolate chips
1 tsp cinnamon
1 tsp vanilla

Place dates in a food processor and process until they form a sticky ball (about 2 minutes). Put the dates in a bowl. Add almonds and cinnamon to the food processor and pulse for about 30 seconds. Add chocolate chips to the nuts and pulse for about 20-30 seconds. Some of the almonds should be finely processed, with some larger chunks remaining.

Add the mixture to the dates. Add vanilla. Combine all five ingredients with your hands -- you really need to work the mixture for a while to combine it all.

Shape into bars, like this:


The dates will become like a paste, but there should still be small nut pieces in your mixture.

I wrap mine in regular plastic wrap and store them in the pantry:

Wrapped and ready to go!
This recipe makes about 5 bars, or fewer if you end up giving pieces to your kids while you're shaping the bars. You can fiddle around with the recipe, trying different nuts or adding in other spices or additional dried fruits to change the flavor. This one, though, is my current favorite.

The bars are a good mix of carbs and protein, making them a nice post-run treat. I ate one after my 22-mile run on Sunday and it tasted great!

Do you have any homemade bar recipes you'd like to share? 
Leave a link - I'd love to check it out!

~ Felice

Sunday, February 26, 2012

Homemade cheez-its style crackers.

If you are cheesy like me, there is no denying the power of the almighty Cheez-It. They are crunchy, cheesy, not-so-good-for-you, yumminess. Their power draws me down the snack aisle at the grocery store and it takes a good bit of willpower to not grab 8 boxes of the things and start the eat them before even getting to the check-out line.

No lie.

So, you can imagine my excitement when I found a recipe for homemade cheez-its that are actually really delicious. Even better, in my humble opinion, than the original!

I'm not the only one who thinks so; the toddler loves them, too!


Really, they are GOOD!

And easy. So easy, I'm ready to share. Here's my recipe, people. Enjoy!

(I modified the recipe from the New Nostalgia blog.)


1 cup flour (total: 1/8th whole wheat, 7/8ths white)
4 tbs cold butter, cut in pieces
1/2 lb (8oz) orange cheddar cheese, grated
1/8 tsp cayenne pepper
3-4 tbs cold water

Preheat oven to 350.

Place the first 4 ingredients in a food processor and pulse until mixture is crumbly. Through the pour spout, add water, one tablespoon at a time, until the dough starts to form. You may need a little less water, you may need a little more. Once you have a ball of dough in the processor, take it out, wrap it in plastic and chill in the refrigerator for 15 minutes.

Place dough on a large cookie sheet covered with a silpat liner (if you don't have a silpat, roll the dough between two pieces of parchment paper). Place a sheet of waxed or parchment paper on top of dough and roll until the dough is very thin. The dough should cover most of the cookie sheet.

** You want to make the dough as thin as possible.**

Using a pizza cutter, cut the dough into small squares (about 1 inch), leaving it all in place when you are done. Using a toothpick, prick each square in the center (to allow air to escape while baking -- this will stop the squares from puffing up too much).

Sprinkle sea salt on top.

Bake for 25-30 minutes, checking after 25 minutes and removing any squares from the outside that appear done. Cool on a cookie rack.

Then, go to town and enjoy your homemade cheez-its!

Cheesy, crispy, flaky goodness!
Do you make your own crackers? Have a favorite recipe? Leave me a comment so I can check it out!


~ Felice


Tuesday, February 7, 2012

Real Food: Baking Bread.

I've turned a corner, my friends. Not just on the doubt issue (but thank you all so much for your great comments!), a different corner. A cooking corner: I've turned a corner in the kitchen.

Yup, I've become a real food addict. Not to be confused with a real food addict. Nope, I'm addicted to making, baking, creating, and serving real food to my family. Might not sound like a big deal; after all, I've long advocated the benefits of eating real food but I'd become a bit of a slacker in recent months. I started to take more and more advantage of convenience foods. Nothing major -- I was still cooking decent dinners and such -- but I was buying and serving more foods that made me cringe just a little each time I served them.

So, just like with the smoothies and the chia, I am now back on the real food track. More whole foods. More organic foods. Less of the processed stuff. I'm not swearing off all conveniences -- I'll still buy my butter (although I did find a good, seemingly easy, recipe for making your own . . . ), and many other things -- but I am striving to be better about the quality of what I feed the family.

And first up: Bread. I've gone crazy bread-baking style!

Um, why didn't I remember how easy it is to bake bread? And how satisfying? Because it is. Easy. Satisfying. And better. Oh, so much better.

Last week I made three loaves of bread, using a recipe adapted from my favorite cooking dude, Mark Bittman.  I first made one loaf and we ate it with a veggie-heavy soup that I made for dinner. It was hearty and good. The next day, the bread made excellent toast:

Mmmm . . . toast!

The second day, I went for two loaves, a regular one and a cinnamon swirl:

That's the cinnamon swirl loaf in the front.

Seriously, bread is not hard to make and I plan to keep baking.

Give it up for homemade bread!

Then, on Friday, I made homemade pizza with -- you guessed it -- dough from scratch. Again, super, super easy! 

Want to hop on the bread-baking train? Here's the simple recipe I used (again, modified a little using Bittman's recipe).

Sandwich Bread

3 cups of white flour
1/2 cup whole wheat flour
1 teaspoon salt
1-1/2 teaspoons instant yeast
1 tablespoon sugar
2 tablespoons butter (softened)
1-1/3 cups milk

Put the flour in a food processor fitted w/a steel blade. Add salt and yeast and process for a few seconds. Keep machine running and pour in sugar, butter, and milk (through the feed tube). Process for about 30 seconds, until the dough forms a bit of a ball. It shouldn't be too sticky. Knead on a lightly floured surface for about a minute.

Lightly oil a bowl and place the dough ball in it, cover with a damp towel, and let the dough rise for about 2 hours. It should double in size (about). Then, deflate the dough, reshape into a ball, and let it rise for 15 more minutes.

Grease a 9x5 inch loaf pan. Shape your bread, put it in the pan, and let it rise one last time, for about an hour. Preheat oven to 350 degrees. After final rise, bake the bread for 45 minutes. Cool on a wire rack. 

Slice. Enjoy!

You can play with the ratio of whole wheat and white flour, or add flax meal, ground oatmeal, whatever you like. I'll be experimenting this week!

What's your favorite bread recipe? 

Have a great day!

~ Felice


Thursday, February 2, 2012

New territory. And January recap.

Before I got sick, I made a big step in my marathon training. On Sunday, I ran my longest run in over seven years. Let me say that again:

On Sunday, I ran my longest run in over seven years. Seven. Years.

Seven years ago, I was childless. Seven years ago I was seven years younger. Seven years ago I had little idea what I was doing with my running.

Now, I'm a wiser runner and, I hope, a better one. Sunday's run would certainly help me to believe that. It was great. I ran at a 9:30-ish pace, starting a little slower and finishing up with a few miles at my marathon goal pace (8:30). I was pleased with how I felt during the run, and after. I ate an English muffin with a little peanut butter prior to my run and took two gels on the run -- a vanilla Clif Shot and a chocolate one. The gels were easy on my belly and kept me energized. I'm more-or-less convinced that the Clif Shot gels are for me so now I just need to bite the bullet and order up a case. Or two. Probably two.

The next day? Well, that's when I was as sick as a cat. And the next, too. So, I haven't exactly run since the 16-miler but I am looking forward to today's run!

*     *     *

Now, about the recap. Marathon training kicked off this month and my mileage reflects that. It was a little lower than planned, because of my own illness (missed a 5-miler) and my son's illness last week (missed a 6-miler). But, that's no big deal in the grand scheme of marathon training. Overall, I'm happy with how my running went this month.

January stats:

Running (miles): 129.7
Racing: 2 -- half marathon and a 15K (both the local Winter Series)
Cross training: 9


Not bad. In addition to the running, I've gotten serious about my smoothies and have been making them almost every day again, experimenting with new and different ingredients and just generally enjoying them. I've also gotten back to having chia every day and I've been creating new healthy recipes. And, I went crazy with the running motivation


In other words, February has a lot to live up to.


Yup. Sure does.


Enjoy the rest of the day!


~ Felice

Thursday, January 26, 2012

Healthy meals: Kale and chick pea roll-ups.

I love kale! So I enjoy finding new uses for it and creating new dishes that feature it. Today, I thought I'd share a recent favorite: Kale and chick pea roll-ups.

These roll-ups are relatively healthy and quick.

First, I start with a whole wheat tortilla, a small slice of cheddar cheese, two stalks of kale, some chick peas (rinsed), and my homemade lemon vinaigrette:


I break the kale off the stalks and tear it into small pieces. After washing it, I put it in a bowl with a sprinkle of the lemon vinaigrette and then microwave it for about a minute:


In the meantime, I break up the slice of cheese and toss a handful of chick peas on the tortilla. After the kale comes out of the microwave, I put the tortilla in for about 45 seconds, just to melt the cheese:


Once the cheese is melted, I crush the chick peas with a fork and the peas and cheese blend together:


I put the wilted kale on the tortilla and roll it up! (Sorry this pic is blurry.)


Cut it in half and viola! Yummy lunch, or even dinner if you add a side salad or some fruit.


I LOOOOVE these roll-ups. The cheese and chick peas are a creamy counterpoint to the crunch of the kale (even when wilted). Yum. Just plain yum. 

Want to know more about kale? Check it out: It is high in vitamins A, K and C, and has lots of fiber. You can read more HERE.

What is your favorite kale recipe? 

Have a great day!

~ Felice

Thursday, January 12, 2012

Getting smooth.

At some point this fall I jumped off the smoothie wagon. Don't know exactly why -- I love my smoothies, after all -- but that's what happened. 

Once I was off the smoothies, I feel like the rest of my eating followed suit. I never fell into the category of terrible eater but I could tell that I just was not eating as well as I should have been. With the start of the new year and new training plan, I'm resolved to get my eating back on track and the first thing that I'm doing is getting back on-board the smoothie wagon.

I love my smoothies! 

Especially . . . 

Vega Vanilla Chai + 1 frozen banana + 1/2c. frozen blueberries + 1/2c. water:


Vega Vanilla Chai Smoothie -- don't let the green color scare you. This smoothie is DELICIOUS!

And . . .

1 c. organic low-fat yogurt + 1 c. blueberries + 1 banana + 1c. water + chlorella:

Blueberry & Chlorella Smoothie
I've also been adding frozen strawberries to some of my smoothies, and using ground flax seeds in place of the chlorella sometimes. Keeping it fresh.

It's pretty cool how much better I feel when I start the day with a smoothie. It's great! I plan to keep it going. If you are what you eat then, for sure, I want to eat (OK, drink) a high-energy, healthy breakfast so I can be a high-energy, healthy running mama!

Do you have a favorite smoothie that you care to share? 


Have a great day, everyone -- it's almost the weekend! Yay!

~ Felice

Thursday, January 1, 2009

Happy Runner Recipes

Here are all of the recipes that have been featured on this blog. This page is still a work in progress, and will be expanded as my recipe feature grows.

Enjoy!

Flaxy Muffins

(click here for the original post)

Preheat oven to 400 degrees. Spray 12 cup muffin pan with Pam or similar spray oil. Or, you could use muffin liners. If you choose to use the liners, though, they can be tough to take off these muffins because they contain so little fat.

1-1/4c. flour (half whole wheat, half unbleached white)
1/4 c. flax meal
1 c. old fashioned oats
1 tsp. baking powder
1/2 tsp. baking soda
1/2 tsp. cinnamon

3 carrots, peeled, steamed and pureed in food processor
1 banana
1 c. 1% milk
1/2c. unsweetened applesauce
1/4 c. packed brown sugar
1 egg

Mix dry ingredients in a bowl (first 6 ingredients). Mix remaining ingredients in a large bowl, stirring with a wooden spoon until well-combined. Add in dry ingredients and stir until combined. The batter will be lumpy, so don't worry about trying to get it smooth.

Pour batter evenly into muffin cups. Bake for 20-22 minutes.

Blueberry Muffins
(click here for the original post)

1/3 stick butter, softened or melted
1 banana
1 egg
1/2c. sugar
1/3c. unsweetened applesauce
1/2c. fat-free plain yogurt
1/2c. fat-free milk (or 1c. of yogurt and skip the milk)
2-3/4c. flour (mix of whole wheat and white)
1/4c. wheat germ
1 tbsp. baking powder
1/2 tsp. baking soda
2c. frozen blueberries.

Preheat oven to 375. Spray a 12 cup muffin tin with cooking spray.

Beat the butter, banana, egg and sugar. Stir in the applesauce, yogurt and milk. Add all the dry ingredients together and mix until just combined. Stir in the blueberries.

Pour batter into prepared muffin tin and bake for about 25 minutes, until the muffins are lightly browned on top.

Enjoy the muffins warm from the oven and freeze what you can't eat within two days or so.

Sauteed Eggplant and Pasta
(click here for the original post)

2 tbsps olive oil
1 medium eggplant, chopped into 1-inch cubes ***EDITED: I forgot to mention that the eggplant should be peeled :-)
1 tsp. kosher salt
1 tbsp. chopped basil
4 medium carrots
1/2 c. sundried tomatoes, julienned
1/2 c. roasted red peppers, sliced
1 can chopped tomatoes (don't drain)

Warm oil over medium-high heat. Add eggplant and sprinkle with salt. Cook, stirring, until the eggplant starts to brown and soften, about 10 minutes. Reduce heat and add basil, carrots, red peppers, both tomatoes. Let simmer for about 20 minutes or so. Adjust seasoning, as needed.

Meanwhile, boil pasta. I use Barilla Plus rotini, but use whatever kind you like. When the pasta is cooked to your liking, drain it and add to the eggplant. Mix together and cook over low heat for a few minutes to let the sauce combine well with the pasta. Serve hot, sprinkled with freshly grated Romano or Parmesan cheese.

Related Posts Plugin for WordPress, Blogger...